Illustrator Quick Tip: Clipping Masks 101
As a signage designer, one of the most powerful tools you will learn to use in Illustrator is the clipping mask tool. This tool will be one of the basics you will learn to use in creating everything from Vehicle Wraps, to complex signage designs.
One of the most common tools that newer Illustrator users seem to struggle with is the clipping mask tool. In this quick tip, you will learn to use 2 different tools. The first will be creating a “compound path,” and then you will learn to use this compound path to create your “clipping mask” over a texture.
Step 1
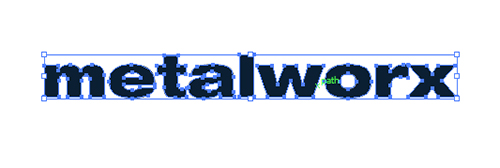
Let’s first start by creating the shape(s) that we are eventually going to use in our clipping mask. Open up a new Illustrator document , and create the text “metalworx” . In our example we’ve used the font Helvetica Neue Black Extended, with the character tracking set to -10.
Convert the font to Curves / Outlines by selecting the text and selecting “Type > Create Outlines”. This will convert the font to nodes. You can no longer edit the font after doing this.
You should have something similar to this by the end of step 1.
Step 2
Now we are going to create the shape that we “minus” our text out of. Take the rounded rectangle tool (from the shapes flyout menu) and create a rounded rectangle similar to the one shown. Use the UP and DOWN arrows on your keyboard while you are drawing your rectangle to change the radius of the edges on the fly. Your rectangle should look roughly something like this.
Step 3
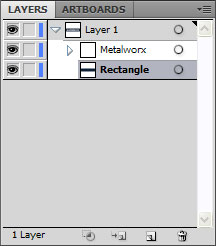
We’ve put the rectangle over top of our text, so we need to readjust our layers palette. In your layers palette, put the rectangle below the text layers as shown.
Change the color of your text layer to white so that your result looks like so.
Step 4
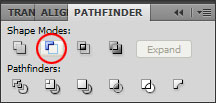
Now we are going to subtract our text out of our rectangle shape. Grab your text layer first, then hold SHIFT while you click the rectangle behind it (or select both layers in your layers palette). Select the “Minus Front” from the Shape Modes in the Pathfinder window as shown.
The result will look the same as before, except it has been subtracted from the rectangle which we can now use for our clipping mask.
Step 5
Download the brushed chrome texture from PSD Graphics; this is the texture we are going to use in our clipping mask. http://www.psdgraphics.com/textures/metal-textures/ Download the graphic labeled “Metal Texture”.
Using File > Place, position the graphic into your artboard as shown, and position it BEHIND the Metalworx shape we have created (as shown).
Step 6
Before we create the clipping mask, quickly select your “Metalworx” shape, and convert it to a “Compound Path” by selecting “Object > Compound Path > Make” from the object menu. This will allow the shape to create a proper clipping mask.
Making sure your metalworx shape is selected still, hold SHIFT and click on your “metal texture”. You should have both selected now. Create the clipping mask by going to “Object > Clipping Mask > Make” from the object menu. You should be left with this result.
You’ve now used a clipping mask! This was a bit more advanced example of using a clipping mask. We could have, for example, simply created a rectangle shape and skipped the “compound path” step, but this teaches you how to use both at once.
To finish it up we went ahead and used several more techniques which we have covered before ,such as opacity masks, to liven up the logo a bit. Here is our finished example.


